SWEET & SPICY NUTS

0 komentar

These nuts would be and excellent snack for New Years, or a great gift for a neighbor or co-workers birthday. I can see many uses for this sweet & spicy treat.

The following spice mixture will do 2 cups of nuts, so if you want to season more than 2 cups, just multiply the spices accordingly.
.
2 cups salted mixed nuts
1 tablespoon melted butter
2 teaspoons chili powder
½ teaspoon garlic powder
½ teaspoon onion powder
¼ teaspoon ground cinnamon
¼ teaspoon cayenne pepper
2 tablespoons white sugar
.
Mix 2 cups of salted mixed nuts with 1 tablespoon of melted butter (toss gently but make sure it covers well). Mix the spices together (all except the sugar) and sprinkle over the nuts (toss gently to make sure it covers well). Spread the nuts out (in a single layer) on a 10 x 15 baking sheet.
.
Bake in a preheated (300F) oven for 10 minutes. Remove from the oven and sprinkle with the white sugar (tossing well to coat). Cool completely (at least an hour). Store in an airtight container, at room temperature, for up to 3 weeks.
.
NOTE: After I sprinkled the hot nuts with sugar, I mixed them well and then transferred them to some paper towels, which removed any excess butter before they cooled.


NOTE: The nuts have a little heat, but they are not overpowering. If you really like to bump up the heat, add a little more cayenne.

NOTE: I used planters mixed nuts. There are 2 cups of nuts in an 11 ounce can.

Homemade Cheesecake Ice Cream

0 komentar

We had homemade cheesecake flavored ice cream for Noche Buena this year's Christmas. And this is the first recipe I posted from our Christmas dinner since this is the one I have been closely watching and actively taking part of, considering that the ice cream maker was the gift I got from my mom this Christmas.

It was as creamy as I can remember, just like the gelato (custard-based, over-priced

GREEN BEAN-MUSHROOM-BACON & CHEESE CASSEROLE

0 komentar

The traditional "green bean casserole" has always intrigued me. I see it mostly during the holidays and I want to enjoy it, although I'm not too fond of the mushroom soup sauce it usually has. This year, I set out to re-invent this holiday casserole and I absolutely love the final results.
.
I used fresh green beans, sauteed sweet onions, portobello mushrooms, crisp bacon, a little cheddar cheese and my own white sauce. The resulting "green bean casserole" was delicious and we ate a ton of it. 1 pound of fresh green beans cut into 2" pieces
½ cup chopped sweet onion
½ pound of baby portobello mushrooms sliced
½ pound of bacon fried crisp (drained well & crumbled)
1 cup shredded cheddar cheese (loosely packed)
1 clove garlic minced finely
3 tablespoons white flour
1 teaspoon salt
scant ½ teaspoon black pepper
2½ cups milk
2 tablespoons butter

In a large frying pan, melt the butter and saute the chopped onions until they smell sweet; add the garlic and saute until it barely turns golden. Add the green beans and mushrooms (mixing well) and saute for a few minutes until they start to wilt just a little (don't cook them all the way through). Remove pan from heat and set aside.
.
In a sauce pan, melt 3 tablespoons butter. When butter is hot, add (all at once) the flour, salt & pepper, stirring quickly. Cook on medium for about a minute (to remove any flour taste). Next, you are going to add the milk, a little at a time, whisking like a mad woman while you add the milk (this will eliminate lumps in the sauce). Once the milk and butter-flour mixture are mixed well, cook on medium heat (stirring every once in a while) until it gets nice and thick.

Remove from heat and stir in the cheese & crisp bacon. Add this mixture to the vegetables and stir well (but gently). Place in an lightly greased casserole dish and bake at 350 for about 30 minutes or until very hot.
.
It was really tasty and the leftovers made a mouth watering lunch the next day.

Our Simple Christmas Dinner

0 komentar


*Recipes coming soon!*

I love the holidays, when everything is just about food. And this time, I just sat and relaxed while my older sister cooks our Christmas meals while I get to taste and eat while she's cooking. I managed to eat a buffet already by the time she forced me to help in preparing the food. So the recipes I will have to verify with both my memory and my sister's memory as well.

MasterChef India Grand Finale

0 komentar

The masterchef india winner has been declared yesterday !! ...

This has been the best reality show I have ever watched. A unique identity for cooking skills has been created with a more serious flavor. The contestants have not been shown any favoritism and have been tested only based on the taste of the food.

The three finalists are a teacher in her 40s who quit her job as the school principal did not give permission to participate, a young lady in her 20s whose husband is a marine engineer living away from home for at least 6 months a year and cooking keeps her active, and a young man in his 30s who had to close down his restaurant due to personal difficulties.

This grand finale is a dream come true with a cash prize of 1 crore and book that will be authored by the winner and a cookery show that will be hosted by the winner.

So have fun watching the Masterchef Grand Finale ...

OATMEAL CRANBERRY WALNUT COOKIES

0 komentar

If you are looking for one more easy cookie to round out your holiday baking, try these delicious cookies. They are light, crispy and buttery tasting (not the standard heavy oatmeal cookie).

1 cup butter (room temperature)
1 cup packed brown sugar
1 cup white sugar
2 eggs
1 teaspoon vanilla extract
1 teaspoon butter extract
1 teaspoon cinnamon
2 cups quick cooking oats
2 cups flour
1 teaspoon baking soda
1 teaspoon baking powder
1 teaspoon salt
2 cups Craisens (sweetened dried cranberries)
1 cup chopped walnuts
Beat butter, sugars, eggs and extracts for FIVE MINUTES (important to the light crispy nature of this cookie).
.
In another bowl, mix the flour, oatmeal, baking soda, baking powder, cinnamon and salt. Add this dry mixture to the butter mixture (1 cup at a time) beating well after each addition.
.
Stir in the dried cranberries and walnuts. Let this finished cookie dough sit for about 5 minutes.
.
Roll the dough into 1" balls (dough will be a little sticky). Place the dough balls on lightly greased cookie sheet, about 2" apart. Bake in 350 preheated oven for 12-14 minutes (my oven took 13 minutes).

NOTE: Before you put the cookie dough balls on the baking sheet, look for the side that shows the most cranberries and put that side up (the prettiest side).

.
NOTE: These freeze very well. I drizzled a vanilla glaze on my cookies (for the holidays) but that is not necessary. Makes about 4 dozen?

CHRISTMAS FRUIT LADDER

0 komentar

I make this fruit ladder every Christmas. It is super simple, fast, looks impressive on any dinner table and is delicious. The dough works beautifully, is very forgiving and never fails!! You can make this ladder with any pre-cooked fruit filling (home made or commercial).


I have had a a few people tell me this looks hard to make, but trust me, it is not. There is just one little trick: roll the dough out into a rectangle and then move it to your baking sheet BEFORE you try to make the ladder. You can't move the ladder (and keep it's shape) after it is filled. The great dough is the real secret to this recipe.

Preheat oven to 350°

1 cup butter softened
1 cup sour cream
2 cups flour

Mix ingredients with an electric mixer (the dough will be a little sticky before it is chilled). Divide dough in half (this recipe makes TWO ladders). Put each ball of dough in some plastic wrap and rough it into a large disk shape…cover well and refrigerate 1 hour (extremely important). After an hour, remove from fridge & flour your counter & rolling pin. Roll one of the disks into a rectangle about 15” x 10”. Pick up the crust rectangle (it will not break) and lay it on a lightly greased baking sheet.
Now I could describe, at length how to do this next step, but a picture will describe it much quicker:


Find the center of your crust rectangle, and spread your fruit filling in a 3” wide strip, long-wise, right down the center of the rectangle (keep the fruit about an inch away from each end of the ladder). Each ladder will take ½ can of commercial fruit filling.
.
Cut the dough, on both sides of the fruit, into equal strips, but be sure you stay about an inch away from the fruit filling. One at a time, pull the strips back over the fruit in a criss-cross fashion (the strips just lay on top of each other, don't crimp). The only part that is crimped is the very first strip (on each end of the ladder), it should be pinched together.
.
Bake the fruit ladder for 30-40 minutes (in a preheated 350 degree oven) or until lightly golden. Run a spatula under the ladder to make sure it is loose, and then slide it off onto a serving plate. Drizzle it with a simple powdered sugar glaze and decorate with nuts (I like candied nuts), sprinkles, or any decoration you like.
I have tried lots of different fruits, cherry, lemon, raspberry, blueberry, apple strawberry, blackberry, etc. Commercial pie filling works as well as home made.

A Trip To Orchard Road

0 komentar


As much as I would have loved going to Singapore to have a taste of the exquisite cuisine of Orchard Road, a student's budget like mine can't possibly afford any trips for now. Not that I can't ask my parents for money, but I would rather not lest they give me a long lecture and probation on who I am going with and whatsoever doubts they can come up with.

So after a long walk around SM Megamall

EASY MICROWAVE CANDY

0 komentar

This is the easiest candy I have ever made and better yet, my picky Hubby gives it two thumbs up!! It is fast to make in the microwave and is pretty enough for Christmas gift giving.

12 ounce bag of good quality white chocolate chips
12 ounce bag of good quality semi-sweet chocolate chips
12 ounce bag of good quality milk chocolate chips
3 cups of your favorite whole nuts (see note)
.
Put the chocolate chips in a large, microwave safe glass bowl and microwave for two minutes at 60% power (imperative that you stir every 30 seconds). My microwave took about 2 minutes and 10 seconds.
.
Stir until all of the chocolate is smooth, then stir in 3 cups of your favorite whole nuts. I ended up adding five cups of whole mixed nuts and I'm fairly certain I could have added one more cup. This makes a LOT of candy!!
.
The recipe calls for spooning candies onto waxed paper, but I spooned mine into mini-cupcake size paper liners. Put them in the fridge to "set" for about 15 minutes and they are ready to serve.
.
NOTE: The candy will only be as good as the chocolate you use. I used Ghirardelli chocolate chips. (Note: You do not taste the white chocolate when they are all melted together (I don't like white chocolate), but the blend of the 3 chocolates is excellent.
.
NOTE: I used a mixture of whole roasted nuts (cashews, almonds, peanuts, pecans, Brazil nuts and hazelnuts...delicious.

Spirulina The Best Whole Food On Earth

0 komentar


( Click image for enlarged view )

My FIL who is 73 years old has been eating Spirulina for the last 15 yrs, and recently I did some research online and amazed by its nutritional value. I have begun to eat this and also told my hubby to have it regularly.

So what is Spirulina ?

UN-WHO ranks the Spirulina the "Most Ideal Food of Mankind in 21st Century", UNFC evaluates it as "Super Nourishing Food"

Upon testing it NASA scientists found 1 kg of Spirulina nutritionally equal to 1000 kg of assorted vegetables.

This superfood is a immortal life form renewing it self for over 3.3 billion years.Today it is consumed by health conscious people all over the world.Its exceptional nutritional value was recognized and consumed by ancient aztecs.

For Protien:
Spirulina is the richest source of protien in the world. It contains all the 18 amino acids the building blocks of protien.

For Iron:
Spirulina is the richest source of assimilable iron in the world

Other Vitamins and Minerals
Spirulina contains all the essential vitamins and minerals like B1, B2, B6, B12, Vitamin E, Potassium, Calcium, Zinc, Magnesium, Manganese, Selenium, Iron, Phosphorus. Know more http://www.naturalways.com/spirulina-analysis.htm

For Anti-aging Benefits:
It is the ideal anti-aging food: high nutrient value,easily digestable and loaded with antioxidants. It is the richest source of beta-carotene required for healthy eyes and vision.As people age many dont eat enough and experience low energy can benefit with spirulina.

Over the last 30 years worldwide medical research has discovered spirulina helps combat problems like diabetes,anaemia and atmospheric pollutio.It helps combat free radicals which are produced by every human being which are assentially unstable molecules that cause ailments like cancer,arthiritis,cataract and premature aging.

For Pregnancy:
The best food for pregnant women as it a perfectly balanced amino acid profile.It natural iron and folic acid improve haemoglobin levels in the blood and also increases lactation in nursing mothers. Spirulina contains all the 18 amino acids in the exact proportion to mother’s breast milk.

For Cancer Prevention
Spirulian has phycocyanin which stimulates hematopoiesis (the creation of blood) and regulates bone marrow stem cell production of red blood cells. Based on this effect it has been approved in Russia as a medicine food for treating radiation sickness. Studies have shown spirulina or its extracts can prevent or inhibit cancers in
humans.

For Stress Management
The richest source of vitamin B-12 which helps to over stress by soothing the nerves.

For Skin
Spirulina contain polysaccharides like green (chlorophyll) which harnesses the suns energy which is considered to be a natural cleanser.

For Heart
The richest source of GLA. Most heart ailments are caused by buildup of low density lipids (low cholesterol). GLA dissolves these deposits. It is the perfect heart healthy food.

For Children
For children there can be no better source of nutrition. Read more on how malnutrition in children has been combated with spirulina .. http://www.antenna.ch/en/malnutrition/spirulina-study.html

How much Spirulina is needed for health ?
It is recommended to have 3 gms a day for adults and 1 gm for children

How to eat Spirulina ?
As Spirulina is a whole food it can be taken alone or with meals

How to compare the nutritional value of Spirulina with other food ?


Is spirulina considered vegetarian food ?
It is one of the chosen food eaten by vegetarians and vegans all over the world


Where to buy Spirulina ?
It is available in most indian pharmacuetical shops

Which brand to use ?
There are many brands that manufacture spirulina , I use Parry Brand which manufactures organic spirulina , approved by USFDA, Japanese and European Health Standards.

How much does it cost ?
Rs 225 (approx 5 USD) in India (for 100 capsules , 500mg/capsule)

Superfast Rava Idli With Sesame Tomato Dip

0 komentar

(Click image for enlarged view)

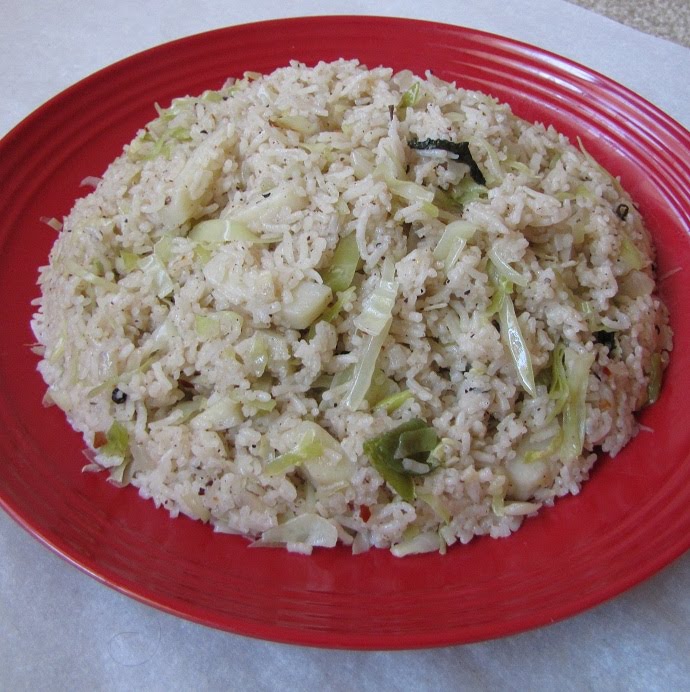
If you are looking for quick,tasty south indian breakfast without any long process of soaking, fermenting , grinding then this rava idli is the best option.I learnt this recipe from my SIL and the accompanying chutney is so perfect you will be asking for more.

Rava idlis have a unique taste that cannot be described easily, it feels spongy, light and has a soft texture that make them even tastier with every bite. This recipe makes 16 idlis of medium size So here is the recipe...

Ingredients
  • 2 cup rava/sooji (semolina)
  • 2 cup thick butter milk
  • 1/2 cup grated carrot
  • 1 tbsp chopped cashew
  • 1/2 tsp chana dal
  • 1/2 tsp mustard seeds
  • 1/2 tsp cumin seeds
  • 2 chopped green chillies
  • 1 spring curry leaves
  • 2 tbsp chopped cilantro
  • a pinch of hing
  • 1 tbsp fruit salt or ENO
  • 1 tbsp ghee
  • salt to taste
(Click image for enlarged view)
Cooking Procedure:

Take the idly racks and spray oil on each idli mould and keep aside.

Heat ghee in a pan ,add chana dal ,cashew n fry till light golden brown ,then add mustard seeds,cumin seed and once they splutter add green chilli,curry leaves,hing ,carrot fry for a min ,then add sooji n fry till it become golden brown .

Shift it to some bowl and let it cool ,once cool add the buttermilk and blend it nicely to semi thick batter like idli batter.

Add ENO to this batter ,and immediatly it become fluffy.

Now put 2 tbsp of batter into each idli mould depression, and stack the racks one above the other and steam in the pressure cooker or steamer for 15min on medium flame.

(Click image for enlarged view)

Remove them carefully from steamer and let it cool, take a sharp spoon and scoop them out into the plate.

Your rava idli is ready.Serve it with your choice of chutney BTW I made sesame tomato chutney for this ,which was the super hit combo for my family .Here is the recipe

Sesame Tomato Chutney

(Click image for enlarged view)
Ingredients
  • 1 cup chopped tomatos
  • 2 tbsp sesame seeds
  • 1/4 tsp turmeric powder
  • 2 tbsp chopped cilantro
  • 1 green chilli
  • 1 red chilli
  • 2 tsp oil
  • 1/4 tsp mustard seeds
  • 1 spring curry leaves
  • 1/4 tsp cumin seeds
  • a pinch of hing
Dry roast sesame seeds and keep aside

Heat 1 tsp oil and add green chilli, red chilli and fry for a min, now add tomato, cilantro and turmeric powder, cover and cook till it becomes soft.Switch off flame and let it cool.

Take the roasted sesame seeds and grind it finely, then add the above tomato mixture and make a smooth paste.

Now prepare the tempering by heating 1 tsp oil, add mustard, cumin, hing and once mustard start to splutter add the curry leaves. Then add the tempering to the above grinded paste.

Your chutney is ready. Serve it with idli, dosa or rice too

Note: You can store the roasted rava in air tight container for later use

APPLE - PINEAPPLE COLESLAW

0 komentar

This sweet and crunchy salad is a nice change of pace from traditional coleslaw; the brown sugar gives it a nice mellow taste.

3 cups of chopped green cabbage
2 peeled, cored and shredded apples (your favorite kind)
1 large grated carrot
1/3 cup finely chopped celery
(1) 8 ounce can crushed pineapple (squeezed dry)
1/3 cup mayonnaise
1/3 cup brown sugar (packed)
1 tablespoon fresh lemon juice
Salt & Pepper to taste

Whisk the mayonnaise, brown sugar, lemon juice, salt and pepper and pineapple (that you have squeezed dry) together until well mixed. Pour over chopped veggies and apples and toss to mix. Chill until dinner time.

NOTE: I used golden delicious apples, but any apple will work.

NOTE: I used ¼ teaspoon of salt and a couple healthy pinches of black pepper.

Yummy Vanilla Cake With Microwave

0 komentar


I began my experiments with baking when I came to US last year, but after returning to India I was wondering how it would turn out if I use my microwave for baking. Today I made a simple vanilla cake and I was pleasantly surprised as it came out so well soft moist with a nice brown shade. So here is the recipe ...

Ingredients:
  • 1 cup all purpose flour (maida)
  • 3/4 cup powdered sugar
  • 2 eggs
  • 1/2 cup buttermilk
  • 1/2 cup butter
  • 1 tsp cinnamon powder
  • 1 tsp vanilla extract
  • 1/2 tsp baking powder
  • 1/4 tsp baking soda
  • 1 tbsp chopped almonds for garnishing
  • pinch of salt

(Click image for enlarged view)

Cooking Procedure

Grease the 8x8 inch pan and sprinkle some flour and keep aside. ( This will ensure the cake does not stick to the pan as seen above )

Preheat the microwave in convection mode at 180 C

Seive the flour,cinnamon powder,salt, baking soda and baking powder atleast twice so that they mix properly.

Beat 2 cups with hand blender till it become fluffy, add buttermilk, vanilla extract, sugar and butter and beat again till it mix nicely.

Now mix the flour to above mixture and fold it smoothly with spatulla until it blends completely.


(Click image for enlarged view)

Now pour the mixture into the pan,sprinkle the almonds and bake for 35 min or till golden brown. Check with a toothpick.

Your vanilla cake is ready, let it rest for it to cool for serving

Note:
  • The batter of the cake should be flowy.
  • The original recipe demands 3 eggs but I was having only two so I used 1/2 cup buttermilk in place of egg.
  • The time for baking varies from microwave to microwave. Adjust accordingly

Homemade Almond Biscotti

0 komentar


I longed for biscotti from Starbucks, but with the extremely busy schedule I have at school, I barely have the time to relax and take a sip of coffee or latte. But as we have stocked up on nuts lately, specifically raw almonds and walnuts still inside their shells, enjoying nice and freshly baked biscotti is not to difficult anymore. But I can't find the nutcracker, and unless I want to manually

Makai Ki Gravy ( Sweet Corn Gravy )

0 komentar

( Click image for enlarged view )

I learnt this recipe while watching masterchef. This recipe is very simple and as a big fan of sweet corn I wanted to try something different. This dish was taught to one of the contestants of masterchef by a royal chef of a palace in Rajastan.

In this makai ki gravy sweet corn is simmered in milk with a light blend of spices to give it a unique taste. The dish I have prepared is ideal for summer. But to make it a winter dish we need to add cashew and almond paste. Which also makes it more rich.

Ingredients
  • 1.5 cup sweet corn
  • 2 cups milk
  • 2 tbsp curd
  • 1 tbsp ghee
  • 1 tbsp garlic ginger paste
  • 1/2 cup chopped onions
  • 1 tsp black pepper
  • 2 red chilli deseeded
  • 1 tbsp cream
  • salt to taste
Cooking Procedure

Heat the ghee in a pan , add onion and saute it for 2 min on medium flame and garlic ginger paste and fry. To avoid the onion from changing color add little water.

Add sweet corn and curd, stir and let it cook till oil saturates. It will take about 5 to 7 min.Then add milk and cook till corn becomes tender.

Add salt,pepper and red chilli with cream and mix nicely at let it cook on low flame for 2 min, cover it for all the flavors to blend with the corn.

Then serve with roti or just have it as snack.

Cabbage Rice With Coconut Milk

0 komentar


( Click image for enlarged view )


I had this rice when I was with my SIL. I love the flavor of this rice so much that I tried it again when I came back to my place. This rice has got a creamy texture as it is simmered in coconut milk and it has a mild sweet taste and pleasant aroma with a little crunch of cabbage. It is a great supplement when we have a spicy menu on the platter.

Ingredients:
  • 2 cups rice
  • 1.5 cup chopped cabbage
  • 1/2 cup diced potato
  • 1/4 cup chopped onion
  • 1 cup thick coconut milk
  • 2 green chillies
  • 1 tbsp garlic ginger paste(4 cloves garlic ,1/2" ginger)
  • 2 springs chopped mint leaves
  • 1/2 tsp cumin seeds
  • 2 cardamom
  • 2 cloves
  • 1/2" cinnamon stick
  • 6 whole black peppers
  • 1 bay leaf
  • 2 tbsp butter/oil for vegans
  • salt to taste

( Click image for enlarged view )

Cooking Procedure

Soak rice in 3 cups of water for 20 minute,then drain water and keep rice aside.

Heat oil in a pressure cooker ,add bay leaf fry for 30 seconds then add cardamom , black pepper,cinnamon stick,clove ,cumin seeds and fry till cumin seeds crackle.

Add onion,green chilli,garlic ginger paste to the above ingredients and fry till onion become light golden brown .Add cabbage,potato and chopped mint leaves and fry for 2 min then add the rice n fry for one more min.

Then add 1 cup coconut milk with 2.5 cups water to the above rice and mix nicely,close the lid n pressure cook for 3 whistles.

After 3 whistles switch off the flame and wait for the pressure to settle down, remove lid and mix it softly and serve hot.

OLD FASHIONED APPLE CRISP

0 komentar

I've been tweaking this apple crisp recipe for most of my married life. I've tried a variety of spices, crusts, topping ingredients, apple types, nuts/no nuts, oats/no oats, baking times, etc. After many years of trial and error, we are happy with this final version. The apples are cut smaller than for a pie (see note) and the topping bakes into a sweet, crispy, nutty perfection.


I like to make this in a 2 piece 10" tart pan because it is very easy to serve and makes a pretty presentation, but any 9" or 10" pie plate would work well also.

(1) 9" or 10" single pie crust, placed into a tart pan (or pie plate) and chilled until the apples are ready.

6 Granny Smith apples (see note)
½ cup granulated sugar
½ cup light brown sugar packed
¼ cup all purpose flour
¾ teaspoon ground cinnamon
¼ teaspoon freshly grated nutmeg

TOPPING
2/3 cup light brown sugar packed
2/3 cup all purpose flour
½ teaspoon ground cinnamon
6 tablespoons butter
½ cup chopped walnuts

Peel and core the apples and slice them very thinly. Blanche the apples in boiling water for one to two minutes (depending on how thin you cut them). Don't cook the apples all the way through, they should still be slightly crunchy.

Drain very well and add the sugars, flour and spices (stir to coat evenly).

Make the topping: mix flour, brown sugar, cinnamon and cut in the cold butter until it is crumbly, stir in nuts. Place apple mixture into chilled crust and spread with topping mixture.

Bake in preheated 375 oven for 40-45 minutes or until the filling looks bubbly. Cool before serving (see note).

NOTE: I like to serve this before it has completely cooled. When it has cooled down enough so that I can hold my hand (without burning it) on the bottom of the pie pan, it is time to eat it. I serve it with vanilla ice cream.


NOTE: I cut the peeled and cored apples into quarters and then cut the quarters in half before I start slicing them. This gives me smaller slices that work well with this crisp recipe.

NOTE: I encourage you to use freshly grated nutmeg if possible, it makes a WORLD of difference (so mellow compared to pre-ground nutmeg).

NOTE: Place your unbaked apple crisp on a cookie sheet before putting it into the oven. The heat from the cookie sheet will help brown the bottom of the pie crust. It will also help with any potential spill-overs.

Pinni - A Perfect Energy Laddu

0 komentar

( Click image for enlarged view )

Hi dearies .... hope u all in good health. It has been a been long vacation and I really missed u all and your wonderfull creations. Thank you so much for all your good wishes and comments.

I spent a good time this whole month, I was tempted to post a recipe but I reminded myself that I am on a vacation : P.In this visit I learnt some new dishes.One of them was this wheat laddu that I learnt from my SIL who is from north india,we had prepared it together. This is made in Rajasthan, Punjab and UP. It is a great treat for kids as it tastes very yummy, also ideal for mothers who have just delivered a baby.As it is also very soft and powdery once in your mouth it would melt easily, it is very ideal for old people too.It is recommended to be eaten with a glass of milk to give complete nutrition.So here is the recipe......

Ingredients:
  • 250 gms wheat flour
  • 250 gms sugar
  • 250 gms ghee
  • 15 gms dry ginger
  • 25 gms chopped cashew
  • 25 gms chopped dry coconut
  • 25 gms chopped almonds
  • 25 gms chopped muskmelon seeds
  • 25 gms chopped makhana
( Click image for enlarged view )

Cooking Procedure

Heat 1/2 of the ghee in a big pan, when it melts completely and begins to simmer add the wheat flour and make the flame to low and stir continously till a nice aroma comes from it and changes its color to light golden brown. Switch off the flame and keep aside for it to cool.

Heat some ghee and deep fry the makhani till it becomes crispy but it should not change its color.Shift the makhani to a plate and let it cool, then crush them with your hands.

Remove all the ghee from the pan into ghee container.

Heat just 1 tbsp ghee and in the same pan and fry the ginger(whole piece) till itbecomes crispy and keep aside to cool. Grind it to a fine powder and keep aside.

Keep 1 tbsp ghee in the pan and fry the chopped chashew on a low flame till golden brown.Shift to plate

And do the same for the rest dry fruits(almonds,muskmelon seeds) and coconut and keep all aside to cool.

Sugar Crystallization Process :
In a deep bottom pan add sugar along with 1 cup of water and stir on medium flame. The sugar will pass through 4 stages (Sugar > Syrup > Thick Syrup > Sugar ) We should be constantly stirring to avoid lumps. In the end it will again be crystal sugar.... if u have some lumps remove them and grind them. Remove to plate and let it cool.

Now take this sugar and with wheat flour evenly, then all the ingredient except ghee.Mix nicely.

Divide the mixture into small portions and add and the required amount of ghee to one portion and shape it into a nice ball.Your Laddus are ready ,shift them to dry container after 2 to 3 hrs.

Note:
If it difficult to fry the total wheat flour at a time then mix the ghee n flour first n divide it to 3 parts n individually u can fry each part separately in a pan ,which will make task easy.

You will finally get to make 10 laddus and these ladoos have a shelf life of one month so u can prepare more to keep it in stock .

BIG MAC & FRIES (CLONE)

0 komentar

I don't know about you, but we enjoy eating a Big Mac 3 or 4 times a year. So I was happy to find this recipe. The sandwich (because of the "secret sauce") really does taste like the "real thing" except so much better!!

First of all, make the "secret sauce" (stir well) and let it sit in the fridge overnight:
.
½ cup mayonnaise
2 tablespoons Wishbone deluxe French dressing
4 teaspoons sweet pickle relish
1 tablespoon re-hydrated onion flakes (*see note)
1 teaspoon white vinegar
1 teaspoon granulated sugar
1/8 teaspoon salt
For the sandwich, you will need some 80% lean ground beef, some thinly sliced dill pickles, some super thinly shredded iceberg lettuce, some slices of American cheese and some very small, inexpensive hamburger buns (see note).
Make 2 very small, very thin pattys for each sandwich; salt and pepper them and fry them on a hot griddle. Starting with the bottom bun, construct the sandwich according to the following diagram:
McDONALD's FRENCH FRIES
.
Cut two Russet potatoes into shoestring size french fries. Dilute ¼ cup of sugar and 2 tablespoons corn syrup in 2 cups hot water. Soak cut french fries in this sugar water for 30 minutes.
Drain potatoes well, and blot dry. Pre-fry in 375 degree oil for 1 minute then drain and chill for 10 minutes. Do a "final fry" in 375 degree oil for about 5 minutes or until golden brown. Drain and salt.
NOTE: I couldn't find Wishbone French dressing, so I used Kraft bright orange colored French Dressing.
NOTE: The recipe specifically calls for re-hydrated onion flakes. I was skeptical at first, but soaked some dehydrated onion flakes in a cup of hot water (for about 10 minutes) and they are EXACTLY like the onions that McDonald's uses. You can use fresh onions, but it won't taste the same. **MEASURE THE ONIONS AFTER THEY HAVE RE-HYDRATED!!
NOTE: The recipe says that your only supposed to use three very thinly sliced dill pickles, preferably Vlasic.
NOTE: Use the small cheap hamburger buns (here they cost about 89 cents for 8). It takes 1½ buns per sandwich. I cut the crust off of one of the buns to use it for the "center bun" in the sandwich. I preheated the buns for just a couple of minutes in the oven, but that isn't necessary.
NOTE: I hope you try this, it is a lot of fun and no more waiting in line at McDonald's for an inferior sandwich.

STURDY BUTTER CREAM FROSTING

0 komentar

Traditionally, butter cream frosting is made with butter, powdered sugar and flavorings, however, I find the recipes that use all butter, tend to be heavy tasting, hard to work with (it melts and sags too easy) and not the light fluffy frosting people expect.
.
I've decorated cakes for years and I keep coming back to this easy, user friendly and fluffy frosting recipe, made with half butter and half white Crisco. Don't freak out about using Crisco in your frosting, you won't be able to tell it is there (shortening is what most commercial bakeries use to make that fluffy frosting we all love) and, as you can see, it pipes nicely.
.
1 cup white Crisco shortening

1 cup butter (room temperature)
6 to 6½ cups of powdered sugar
½ cup whipping cream
2 teaspoons vanilla extract
1 teaspoon almond extract (important)

In the large bowl of a stand mixer, whip the shortening and butter together for about 3 minutes on high. Add 6 cups of powdered sugar, the extracts and whipping cream to the butter mixture and whip ON HIGH for about 8 to 10 minutes.

After that amount of time, check the frosting for consistency. Usually, the frosting is perfect, but if your climate is different from my climate, you may want to add an additional ½ cup of powdered sugar.

Once you frost your cake, put it in the fridge to let everything "set". Remove your cake from the fridge about an hour before serving.

NOTE: This frosting works best in a stand mixer, although you can make it with a hand held mixer (it will just take a little extra time).

CINNAMON ROLLS (no yeast)

0 komentar

These cinnamon buns have NO yeast in them, but they sure taste like they do. I have to admit that when I first saw this was a baking powder dough, my first thought was, "uh oh, a heavy biscuit texture", but I was wrong; these are FAR from the standard biscuit taste. The dough has cottage cheese and buttermilk in it and it is super flaky, light, sweet and tender. I have tried a lot of cinnamon roll recipes over the years and I can honestly tell you that this recipe was a total surprise. It is SO tasty, SO easy and SO fast.

MAKE THE FILLING FIRST
1½ tablespoons melted butter
2/3 cup brown sugar (packed)
1½ teaspoons cinnamon
½ teaspoon allspice (I left out)
¼ teaspoon ground cloves (I left out)
1 cup chopped pecans
Mix well and set aside

DOUGH
¾ cup cottage cheese (4% milk fat)
1/3 cup buttermilk
¼ cup white sugar
4 tablespoons butter, melted
1 teaspoon vanilla extract
2 cups all purpose flour
1 TABLESPOON baking powder
¼ teaspoon baking soda

Preheat the oven to 400 and grease the sides and bottom of a 9" or 10" springform pan with cooking spray. In a food processor, combine the cottage cheese, buttermilk, sugar, melted butter and vanilla; process until smooth (10 seconds). Add the flour, baking powder & baking soda and pulse in short bursts just until the dough clumps together in a ball (don't over-process). The dough will be soft and moist. Dump the dough out onto a lightly floured counter and knead it four or five times with floured hands (this is a beautiful dough, very easy to work with). Roll dough out to a 12" x 15" rectangle.

Brush the rectangle with a very light coating of melted butter (be skimpy & leave a half inch border unbuttered around the edges. Sprinkle the filling over the buttered area and pat lightly.

Starting with the long side, roll up the dough into a jelly roll shape and pinch the long seam to seal (leave the ends open). Cut into twelve equal pieces with a sharp knife (a sharp serrated knife works well). Set the rolls in the prepared pan, cut side up. The rolls should touch slightly, but its OK if there are small gaps. Bake at 400 for 20 to 28 minutes (mine took the full 28 minutes) or until golden brown.
Set the pan on a cooling rack for five minutes. Remove the springform ring and drizzle the glaze over the rolls. Yum!!!

GLAZE
2/3 cup powdered sugar
2 to 3 tablespoons of cold milk (I used whipping cream)
1 teaspoon vanilla extract
I added ½ teaspoon of maple extract - my tweak
Whisk all ingredients together. If it seems too thick to pour, add a little bit more milk (or cream).

FUDGE FILLED PEANUT BUTTER COOKIES

0 komentar

This impressive (but very simple) cookie will be great for the holidays. It consists of a sweet peanut butter cookie shell, filled with a rich fudge filling. When you first make the cookies, the filling is soft enough to pipe (or you can spoon it into the shell). However, after it completely cools, the filling is the consistency of a soft fudge. They are delicious, and look so pretty!!!
 ½ cup butter (room temperature)
½ cup creamy peanut butter
½ cup white sugar
½ cup brown sugar
1 egg
1 teaspoon vanilla
.
Cream the above ingredients together until smooth, then add:
.
1¼ cups all purpose flour
¾ teaspoon baking soda
½ teaspoon salt
.
Beat everything until very smooth. Shape dough into 1" balls (makes about 4 dozen) and place each ball into the bottom of a mini muffin tin (ungreased) like this:
Bake in a preheated 375 oven for about 10-11 minutes or until they look like this:

After they are baked, find something in your kitchen that has a round end that you can use to press down on the center of these HOT cookies (to make the shell shape). I used the large rounded end of my mortar and pestle, but anything will work. Just be careful not to press so hard that you break through to the bottom. They should look like this:
Let these cookies cool (in the pan) for 10 minutes, then use a thin (but pointed) paring knife to assist you in lifting the cookie shells out of the pan (they come out pretty easy). Cool shells on a baking rack.
.
FILLING
1 cup milk chocolate chips
1 cup semi-sweet chocolate chips
1 (14 ounce) can sweetened condensed milk (not evaporated)
1 teaspoon vanilla extract
.
Melt the chocolate in a double boiler over simmering water (I just used the microwave). With an electric mixer, beat in the sweetened condensed milk and vanilla until smooth. Fill the cookies.
The fudge dries to the touch after it is completely cooled.

HEINZ CHILI SAUCE CLONE

0 komentar

This is a clone recipe for Heinz chili sauce. It is so easy...takes every day ingredients and is even tastier than the original!! Chili sauce was never a pantry staple for me; I always found it on my shopping list for holiday and special occasion recipes, like this shrimp cocktail (which calls for Heinz chili sauce). I will never buy commercial chili sauce again because this is so much better (and cheaper)!!!


1 cup of tomato sauce
1/3 cup light corn syrup
¼ cup white vinegar
2 teaspoons dry onion flakes
2 teaspoons granulated sugar
1 teaspoon salt
1 teaspoon lemon juice
1/8 teaspoon garlic powder

Whisk everything together and bring to a boil in a small saucepan with a heavy bottom. Turn heat down to a low simmer and cook for 25-30 minutes, depending on how fast you are simmering it (mine was done in 25 minutes). Watch it towards the end so it doesn't scorch.
Cool to room temperature, then cover and chill.
It will get nice and thick like this.

NOTE: I made this recipe, exactly as it is stated above, I don't know how it would effect the final results if you use fresh onions.

PEANUT BUTTER BON BON's

0 komentar

Today is our 40th Wedding Anniversary, where have all the years gone? We are celebrating quietly at home, with shrimp cocktail, filet mignon, cherry pie and these little peanut butter beauties!!
They are very easy to make and totally addicting. The filling was adapted from a recipe called Buckeye's, but I changed it a little bit...made them much smaller and completely covered them with chocolate, then decorated with a little white drizzle. These will be wonderful for any holiday gathering.
.
1½ cups creamy peanut butter
½ cup butter (room temperature)
1 teaspoon vanilla extract
4 cups powdered sugar (sifted into a cup)6 ounces semi-sweet chocolate chips
2 tablespoons shortening
.
Mix the peanut butter, butter, vanilla and powdered sugar with a stand mixer (or your hands) until you get a smooth dough (to measure sugar, sift it into a measuring cup and level it off with a straight edge).
.
Shape the dough into 1" balls and set them on a wax paper lined cookie sheet and put them in the freezer for about an hour.
.
In a double boiler, melt shortening and chocolate together over barely simmering heat. Remove balls from freezer (just about a dozen at a time) & poke a tooth pick into the top of a chilled dough ball (to use as a handle) and dip into chocolate, then sit on a wax paper lined tray & put in fridge (leave the toothpick in the candy until it's chilled again, it is easier to remove that way). Continue until all of the candies are coated (makes about 50 depending on how large you make them.

The chocolate will set (be dry to the touch) after about 10 minutes in the fridge. Remove from fridge, take out the toothpick and cover up the little toothpick hole with more chocolate. You can cover the little hole with chocolate or white chocolate.

These need to be kept in the fridge until you are ready to serve them. I dare you to eat just one!!

KID FRIENDLY JELLO FROSTING!!

0 komentar

Follow Me on Pinterest
NOTE: Since I posted this recipe last year, I have had a lot of people write to me saying they LOVE the recipe, however 2  other people wrote to say that this recipe did not work for them. Since it has ALWAYS worked for me, I did some investigating and found that those 2 people used a small hand held mixers (I always use my big stand mixer with a wire whisk attachment). I was glad to hear that, when the women who wrote to me, switched to a stand mixer with wire whisk, the frosting turned out beautifully. Evidently, some brands of hand held mixers are not strong enough to whip this frosting correctly.
~~~~~~~~~~~~~~~~~~~
This frosting recipe has a lot of things going for it. It is fast, super light, smooth and creamy on the tongue (very similar to a 7 minute frosting, but so much easier). Neatest of all, is that it is flavored with jello, so you can make it in ANY Jello flavor you like...watermelon? blueberry? pina colada? Kids will LOVE this frosting.

3 ounce pkg. of Jello (favorite flavor)
2/3 cup granulated sugar
1 egg white
1 teaspoon vanilla

Place the above ingredients in a large GLASS OR METAL mixing bowl (OF A STAND MIXER). Turn the mixer on high just as you add ½ cup of boiling water. Whip on high for five minutes and you will get this:


 NOTE: This recipe only seems to work if you use a  stand mixer, with whisk
attachment. Also, make sure you use a glass or metal mixing bowl, do not try this with a plastic bowl.

NOTE: Some people have commented that they don't think raw egg whites are safe for children to eat. The egg whites in this recipe are no longer raw after you add the BOILING WATER.

NOTE: This recipe makes enough to frost 24 cupcakes, or a 9 x 13 cake. If you are going to do any piping or edges, you might have to double the recipe.


NOTE: This frosting pipes beautifully and holds its shape well. Like any 7 minute type frosting, it does get a little sticky/tacky the second day, so its best if you make it the day you want to serve it. If you have to make it the night before, just store it in an airtight container that doesn't touch the frosting.

NOTE: This frosting has so many fun possibilities for birthday cakes/cupcakes. It would also make a wonderful filling.

Popular Posts

 
  • For Secret Recipe © 2012 | Designed by Rumah Dijual, in collaboration with Web Hosting , Blogger Templates and WP Themes